By Graham Palmer
Cloth diapers for infants work a lot like disposables in daily use: you put one on, change it when it’s wet or soiled, and toss it in a pile to be dealt with later. The difference is that a cloth diaper is reusable, and that means you need a plan for sizing, fit, laundering and storage. This guide walks you through each step so you can start with a small, workable setup and build from there.
What You Will Achieve With Cloth Diapers for Infants
By the end of this guide, you’ll know how to pick a diaper style that suits your baby’s size and your routine, set up a simple changing and storage system, wash and dry diapers in a way that keeps them absorbent and odor-free, and troubleshoot the most common problems. Most families find that a few well-chosen basics cover the first several months, with the setup becoming more automatic after a week or two.
Step 1: Choose the Right Diaper Type
Cloth diapers come in several basic formats, and each one trades off convenience against absorbency and drying time. If you’re just starting out, it helps to understand the categories before buying in bulk. For a full breakdown, see Types of Cloth Diapers. Here is a quick comparison:
| Type | How It Works | Best For | Drawbacks |
|---|---|---|---|
| All-in-one (AIO) | Absorbent layers sewn in, no separate parts | Caregivers who want disposable-style simplicity | Slowest to dry, fewer absorbency options |
| Stuffed with a separate insert through an opening | Adjustable absorbency, quick drying of shell | Stuffing and unstuffing adds steps | |
| All-in-two (AI2) | Shell plus snap-in or stay-dry insert | Balance of ease and drying speed | More pieces to track |
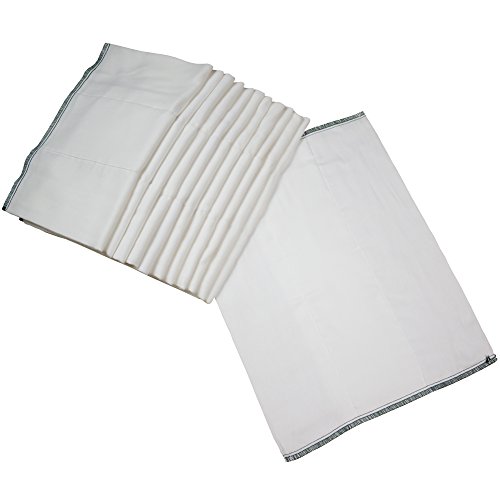
| Prefold with cover | Flat or contour fabric folded and held by a waterproof cover | Budget-minded families, heavy wetters | Requires folding and pinning or snapping |
| Fitted with cover | Snap-closed absorbent diaper worn under a wrap | Trim fit and fast drying | Needs a separate cover each change |
For a newborn, many parents prefer a one-size system or a set of newborn-specific diapers, since newborns outgrow standard sizes quickly. Check each brand’s size range and rise measurements before you buy, because “one size” claims vary.
Step 2: Gather Your Starter Supplies
You don’t need a full drawer of diapers to begin. Plan around the number of changes your baby needs in a day, plus a buffer for laundry days. Newborns often need 10 to 12 changes a day, so a starter stock covers roughly two days before a wash.
Starter checklist
- 12 to 24 diapers or covers in a newborn or one-size fit
- Extra inserts if your style uses them
- A waterproof wet bag for travel and daytime storage
- A lidded pail or hamper with a washable liner
- Cloth wipes and a small spray bottle or wipes solution
- Fragrance-free, diaper-safe detergent
- Diaper cream that won’t cause repelling (check the label for zinc oxide or petroleum guidance from the manufacturer)
For storage options, 15 Best Cloth Diaper Pails compares pail styles, and Best Wet Bags for Cloth Diapers covers travel and daily bags.
Step 3: Set Up a Simple Changing Area
A consistent changing spot saves time and keeps supplies within reach. Keep a stack of diapers, wipes, a covered pail and a clean cover on a shelf or basket at changing height. A changing mat with a waterproof surface is useful, and you can find guidance in Setting Up a Cloth Diaper Changing Station at Home.
Step 4: Fit the Diaper Correctly
Fit affects leaks more than almost anything else. Use these checks on every change:
- Start with the diaper’s rise (the front-to-back height) matched to your baby’s torso. A diaper that’s too low in the back will leak at the back.
- Set the waistband snaps or rise settings snug but not tight enough to leave deep red marks.
- Tuck the leg elastic inside the diaper, not outside, so the gaps close.
- Check that the insert sits at the front for boys and centered or slightly back for girls, then adjust as needed.
- Look at the fit after a few minutes of movement, since some diapers gap once a baby starts kicking.
If leaks keep happening, work through Solving Common Cloth Diaper Leaks and Odors, which covers fit, absorbency and detergent buildup.
Step 5: Layer Inserts for Absorbency
Inserts are where you adjust for heavier wetters. A common approach is to start with one insert for a newborn’s light output and add a second for naps or overnight. Lay inserts so their longest edge runs front to back, and avoid folding them over themselves, which creates a hot spot that leaks. Full guidance is in How to Use and Layer Cloth Diaper Inserts.
Step 6: Wash Cloth Diapers Properly
Washing is where most families struggle. Follow a routine built around a cold or warm pre-rinse, a hot main wash with an appropriate detergent amount, and a second rinse. Avoid fabric softener and dryer sheets, since they coat fibers and reduce absorbency. The full process is covered in How to Wash Cloth Diapers.
Detergent choice matters. Pick a product labeled for cloth diapers or one the manufacturer confirms is safe for them. If your diapers start repelling, a stripping routine may be needed; see Choosing and Stripping Cloth Diaper Detergent.
Step 7: Dry the Diapers
Air drying in sunlight is gentle and effective for most fabrics, and the sun naturally brightens stains. Some covers and elastics do better air dried, and many manufacturers recommend against high heat for PUL and elastic. Read the care instructions for each brand. More detail is in Proper Methods for Drying Cloth Diapers.
Step 8: Store Soiled Diapers Hygienically
Store soiled diapers in a closed pail or wet bag, and empty solids into the toilet before they go in. Rinse or pre-treat as directed by your pail or wash routine so odor doesn’t build. Good storage habits are explained in Hygienic Storage for Dirty Cloth Diapers.
Common Mistakes to Avoid
- Using fabric softener, dryer sheets or heavy oil-based creams, all of which can cause repelling.
- Washing with too little detergent, which leaves residue, or too much, which also causes buildup.
- Letting soiled diapers sit for days in a sealed container without rinsing or washing.
- Buying too few diapers and running out before a laundry day.
- Choosing a size by age instead of by weight and rise measurements.
- Assuming all detergents are safe for cloth diapers without checking the label.
Tips for Beginners
- Start with one diaper type and one detergent. Changing both at once makes problems hard to diagnose.
- Keep a laundry log for the first two weeks so you can spot patterns in leaks or odor.
- Expect a learning curve of about one to two weeks before changes feel routine.
- Buy a few extra inserts or covers early, since they wear out at different rates.
- Check the manufacturer’s care sheet before the first wash, because pre-wash steps differ by brand.
Recommended gear
These items are the most widely used accessories for a cloth diapering routine. Confirm compatibility with your chosen diaper brand before buying.
- Wet bag: A waterproof, washable bag keeps soiled diapers contained while you’re out. View on Amazon
- Diaper pail with liner: A lidded pail with a washable liner makes daily storage simple. View on Amazon
- Diaper-safe detergent: A detergent labeled for cloth diapers helps avoid buildup. View on Amazon
- Changing mat: A waterproof mat protects surfaces during changes. View on Amazon
FAQ
When should I start using cloth diapers for infants?
Many families start from birth, though some wait until the baby’s first few weeks to settle into feeding and routine. Newborns need frequent changes, so starting early means learning the system while changes are most frequent.
How many cloth diapers does a newborn need?
A common starting stock is 12 to 24 diapers or covers, plus extra inserts if your style uses them. This lets you cover about two days between laundry loads, depending on how often your baby wets and soils.
Do cloth diapers leak more than disposables?
Leaks often come from fit, insert placement or buildup rather than the diaper itself. Adjusting rise and leg gaps, and washing correctly, resolves most leaks. The troubleshooting guide linked above covers these causes.
Can I use regular detergent on cloth diapers?
Many standard detergents leave residue that reduces absorbency. Choose a product labeled for cloth diapers, or confirm with the diaper manufacturer that a specific detergent is acceptable.
Is it safe to use cloth diapers at night?
Yes, but many parents add an extra insert or use a more absorbent option for overnight use. If you have concerns about skin irritation or diaper rash, talk to your pediatrician or a pediatric nurse.
How do I handle diaper rash with cloth diapers?
Change diapers promptly, rinse the skin, and check that your diaper cream is compatible with cloth. Persistent or severe rash should be evaluated by a pediatrician, since it may need a different treatment.
Do I need to strip cloth diapers?
Stripping is needed only when buildup causes repelling or odor that regular washing doesn’t fix. Use a stripping product as directed by the manufacturer, and avoid doing it too often, since it can wear fabrics.
Conclusion
Cloth diapers for infants are manageable once you understand fit, washing and storage. Start with a small, well-chosen set, learn one routine at a time, and adjust based on what your baby and laundry load need. Within a few weeks, most families find the system runs smoothly, and the troubleshooting becomes a short, occasional task rather than a daily worry.

About Graham Palmer
Graham focuses on practical advice for natural & eco parenting: what matters before you buy, what to skip, and how to get more out of what you already own.